 Teamviewer
PS Cashbook
Importing Bank Statements From a File
Summary
How do I import Bank statement from a bank-generated file?
Detailed Description
Step 1.
Ensure you have a comma-separated-variable (csv) file of your bank statement saved on your computer. This is a file with each bit of information separated by a comma. Most bank exports will allow you to choose this format. If you are unsure if you have the correct file, that will come to light as you go through the import process - the information displayed will not make sense if you have the wrong format.
Step 2.
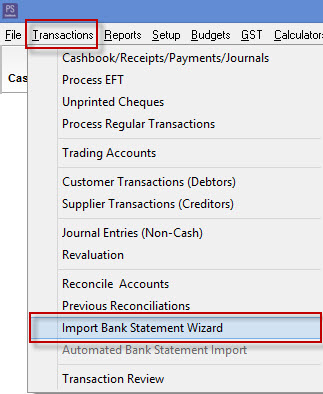
Click on the Transactions > Import Bank Statement Wizard menu option.
Step 3.
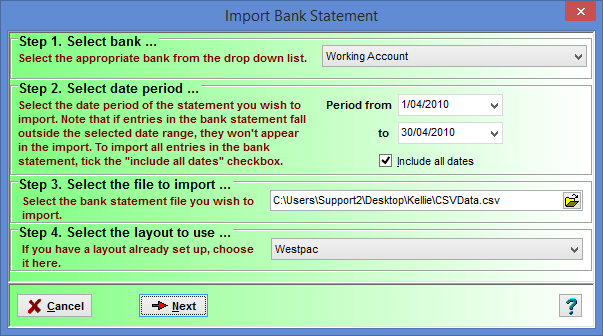
The window below will appear. Work your way through each of the steps on that window:
- Select the bank for which you you will import the statement.
- If you want to restrict incoming transactions to a specific date range, enter the dates, otherwise ensure Include all dates is ticked.
- Select the file to import
- Select the layout you wish to use. If you have not previously defined a layout for the selected bank, choose the <Create New Layout> option. The layout tells Cashbook what type of information is contained in each of the incoming columns in the selected file.
- Click on the Next button.
Step 4.
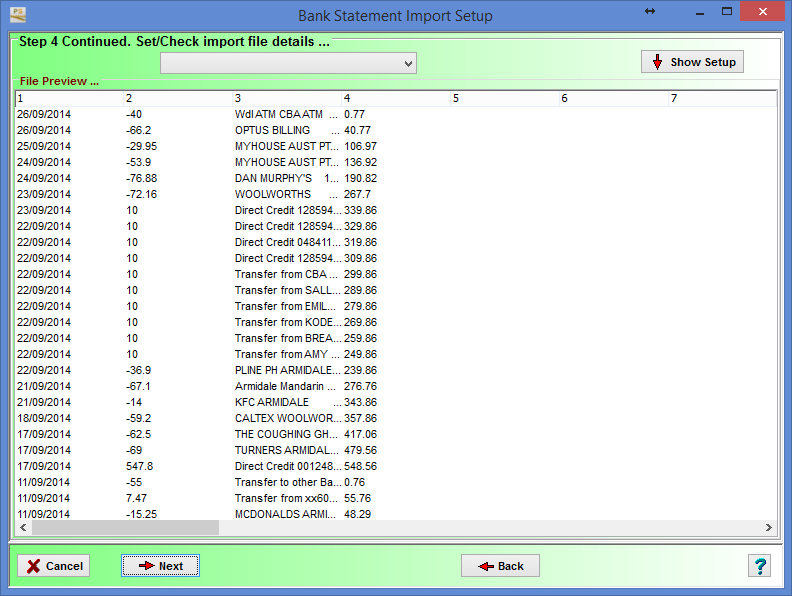
If you had selected the <Create New Layout> layout option, the information in the selected file will appear. You then need to tell Cashbook what is represented in each column.
Step 5.
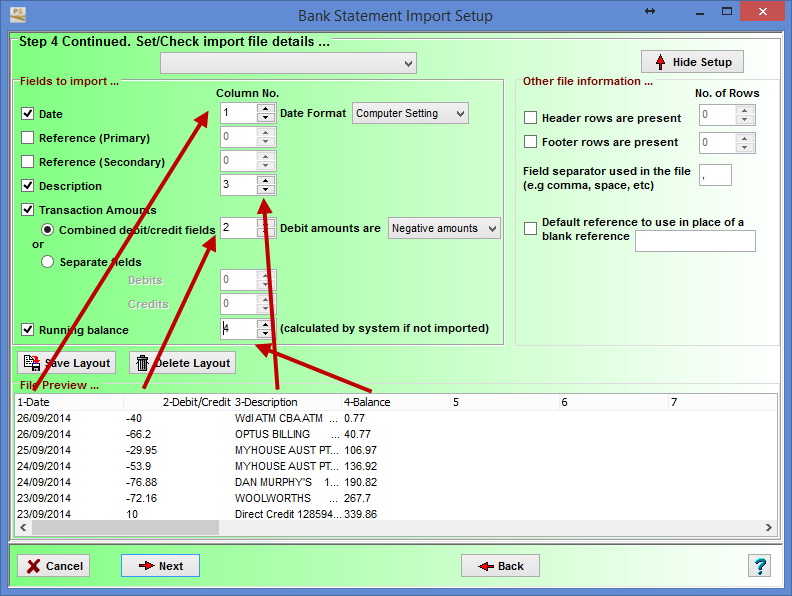
Click on the Show Setup button. You need only define the columns that you wish to import, but you will need a date and amount, and preferably a description and reference. For amount, you will need to indicate if there are separate columns for debits and credits, or, if only 1 amount column exists, how debit amounts are identified.
If there are rows at the top or the bottom of the data that do not represent valid transactions, tick the Header rows are present and/or Footer rows are present and select how many rows should be ignored.
You can specify a default reference, for any transactions that do not have a specific reference.
Click on the Save Layout button and give the layout a name. This layout can then be selected next time you import data for the selected bank. You should then be able to ignore Step 5.
Click on the Next button.
Step 6.
You will then be shown the transactions again with correct column headings. If you wish to ignore a transaction on the statement you may tick its Ignore box. If this screen is blank, please go back to Step 3 and ensure the dates are correct (or simply tick Include all dates).
Note that if you have previously mapped portion of incoming descriptions to specific suppliers/customers, the supplier/customer should have been automatically linked in the display below. For example, if a payment to NRMA always includes the word 'Motor Vehicle' then you could link such transactions to a supplier called 'NRMA'.
You can map portions of descriptions to customers/suppliers in advance of doing a bank statement import, via the Setup > Suppliers and Customers menu option. Edit each required customer/supplier and click on the Bank Statement Link tab.
If the Customer/Supplier column is empty, you can either:
- leave it blank, and assign the customer/supplier as the transaction is processed
-
type in some text sufficient for you to determine the destination of a payment or source of a receipt. In this situation, the text will displayed as red and you can click on the + button to add a new customer/supplier if so desired.
- choose a customer/supplier from the dropdown list. In this situation, the text will be displayed as red, and you can click on the Link button to assign a new link for this customer/supplier. Once linked, the text will display as black.
NOTE: Linking customers/suppliers to consistent portions of incoming transaction description will greatly reduce the time to process subsequent imports, as each customer/supplier can be assigned a default account and enterprise, which eliminates the need to enter any of this information as each transaction is processed.

Step 7.
Click on the Process button. This will take you through each transaction in turn (unless you have ticked the Ignore column) to finalise it. You can cancel any transaction along the way (it will be removed from the import file, as though it had been processed), or abort the entire import process to be resumed at a later time.
You will be notified if any incoming transaction appears to match to a transaction already in Cashbook, and given options for how to proceed.