 Teamviewer
PS Cashbook
Restoring Data from a Backup
Summary
How do I restore data from a Cashbook Plus! backup?
Detailed Description
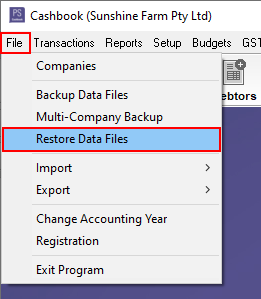
Step 1
- Click on the File > Restore Data Files menu option.
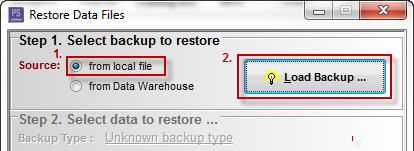
Step 2A: Restoring from a local file
- If restoring from a portable storage device (e.g. USB, CD), insert the relevant device into the appropriate drive.
- For Step 1. Select backup to restore, select 'from local file' as Source.
- Click on the Load Backup ... button.
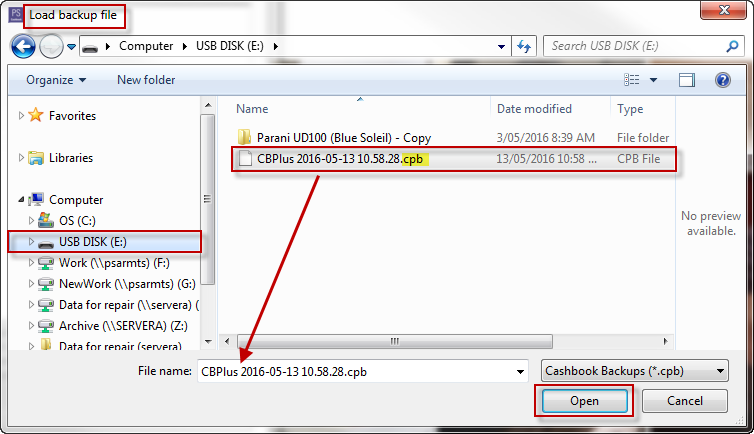
- Find your saved data file backup in the Load backup file window.
- Click on the Open button.
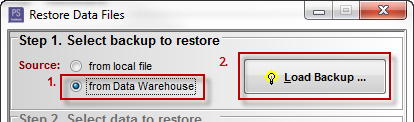
Step 2B: - Restoring from the Data Warehouse.
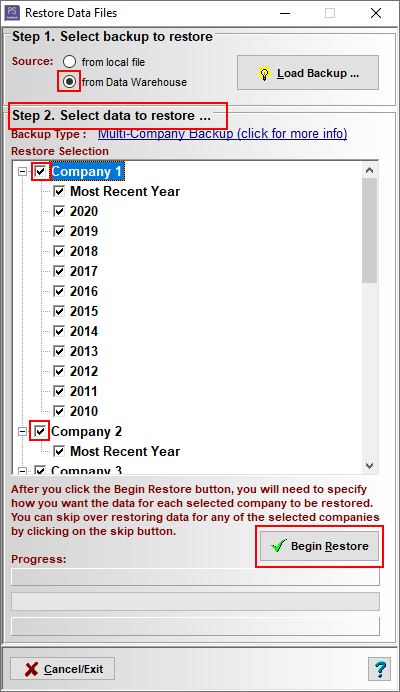
- Step 1. Select backup to restore
- Select 'from Data Warehouse' as Source.
- Click on the Load Backup button.
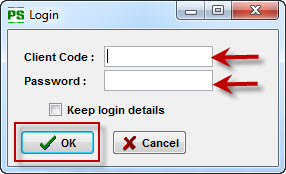
- At the login prompt, log in using your Client ID and password.
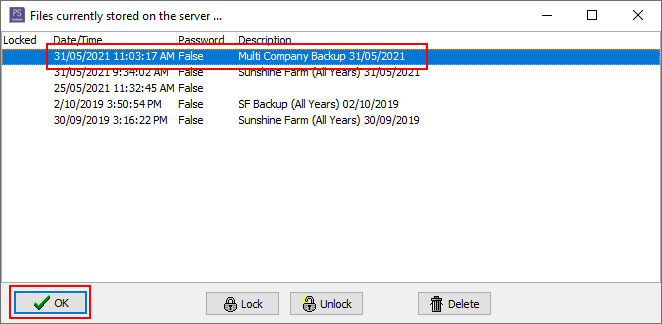
- Select the backup to restore, then click the OK button.
Step 3: Selecting the data to restore.
From here the restoring process is the same for both local file and Data Warehouse options.
- Step 2. Select data to restore ...
- Select the company/s and year/s you wish to restore, by ticking the checkboxes next to the company/s and the financial year/s.
- Click on the Begin Restore button.
- Once you click on the Begin Restore button, you will be taken through a loop for each selected company to restore.
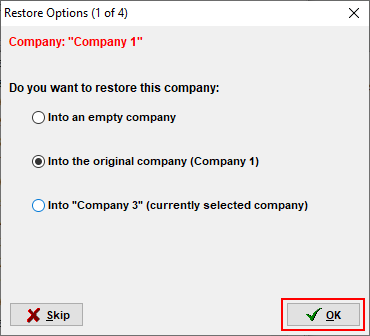
- You have an option to skip a company (even though you select a company in Step 2, you can omit it from the restore in this step), via the Skip button (Cancel if you are only restoring one company). See next screen-shot.
-
The company you are about to restore is highlighted in red at the top of the window. Its position in the loop is also detailed in the title bar e.g. 1 of 4 means that you selected to restore 4 companies and are currently working with the first.
-
If not skipping the company, you need to select how you want the data restored. Options not valid for each company will be visible but disabled:
-
Restore as new – this option will be always available unless you are at level 1 of the software. Use this option if you wish to create a new company. In the next step you will then be asked for a new company name.
-
Restore into original – this option will overwrite the data of the company that matches the backup company currently displayed, even if the company is not currently selected (open) (see note 1 above). Matching will be via a unique identification assigned to each company as a result of this upgrade.
-
Restore into current – choose this option if you wish to restore the backup company currently displayed (see note 1 above) into the company currently selected in Cashbook. This option will not be available if:
-
the current company selected in Cashbook is the Demonstration company, OR
-
you have selected more than one company to be restored, OR
-
Cashbook knows that the backup company currently displayed is the same as the company currently selected in Cashbook.
-
-
-
If the Clear existing data is enabled and ticked, all years in the company into which the backup company is restored will be deleted before the restore. This ensures that previous years are not linked to the wrong company.
-
Restore “Most Recent Year” into – this option is not available if
-
you have selected ‘Restore as new’ OR
-
you have selected more than one year of the current backup company to restore, OR
-
‘Clear existing data’ is ticked.
-
You can either select a year from the drop down list or type in a year that is less than the most recent year of the company into which the data will be restored.
Note: If you have only purchased level 1, you will only ever be able to restore one company, and it must be into the single company allowed for level 1.
Click on the OK button to complete the restoration of the current backup company. A bar will display the progress. Once complete, the next selected company will be available for setting the restore options and so on. If there are no further companies selected, the restore window will close.