 Teamviewer
PS Cashbook
Trading Account Setup
Summary
How do I set up my Trading Accounts?
Detailed Description
Advanced Trading Accounts provide a powerful tool to track trading activity and inventory for:
- Livestock
- Fibre Production
- Cropping
- Cropping by-products
The system provides the flexibility to track livestock down to an individual class level (eg. calves, bulls, heifers, cows, etc.) or just at the enterprise level (eg. Trading Cattle, Breeding Cattle, etc.) There is similar flexibility to track cropping activity at an enterprise or individual crop level.
Trading accounts work on a 12 monthly spreadsheet within the currectly selected financial year.
Purchases and sales details will be automatically updated to the trading accounts, which then automatically produce the resulting closing inventory qunatities and values.
Adjustments such as natural increase, losses, transfers, etc. can be entered directly into the appropriate section on the grid.
Before setting up Trading Accounts make sure you have:
- Set up your Chart of Accounts correctly.
- Set up your Enterprises correctly.
Step 1: Set up Chart of Accounts
Make sure that the Chart of Accounts have been correctly set up with all required trading account related income (sales) and expense (purchases) accounts. These will enable automatic updating of the trading account as purchases and sales transactions are entered into Cashbook.
If you intend to track livestock and or/crops down to individual class level (For example: for Cattle enterprise, the livestock classes could be - bulls, calves, cows, heifers, etc.), ensure that all purchase and sale accounts have the Requires enterprise entry and Requires enterprise class entry checkboxes ticked. Note that only 1 sales account and 1 purchase account can be assigned to an enterprise, so if you are tracking down to enterprise classes, each account to be used for a class must be a sub-account of the primary (control) account to be assigned at the enterprise level.
- Click on the Chart icon on the toolbar.
- Click on the Income tab.

- Click on the Income account to highlight (or create a new one via the Add button).
- Click on the Edit button.
- Fill in all account setup information.
For example, for an account 040 Cattle Sales, set up sub-accounts for each of the classes:

Similarily, for Expenses

Note: only purchases and sales accounts are set up in the chart of account. All other trading account categories (eg. opening & closing stock, losses, etc.) are handled directly in the trading account section and do not require accounts in the chart.
Step 2: Set up Enterpirses
Depending on the Company Template you selected (eg. Cattle, Sheep, Grazing, Farming etc.) when you added your company to Cashbook, default Enterprises are already setup in your Trading Accounts. These can be Added to, Deleted or Edited. You can make these as simple or as complicated as you require.
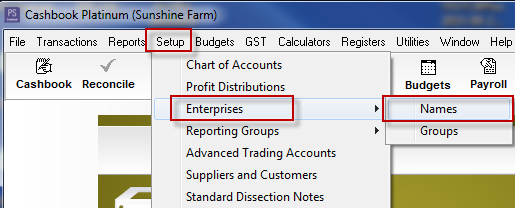
- Click on the Setup > Enterprises > Name menu option
Either:
- Click on the Add button to add a new enterprise, or
- Click to highlight an Enterprise.
- Click on the Edit button (or simply double-click on the enterprise).
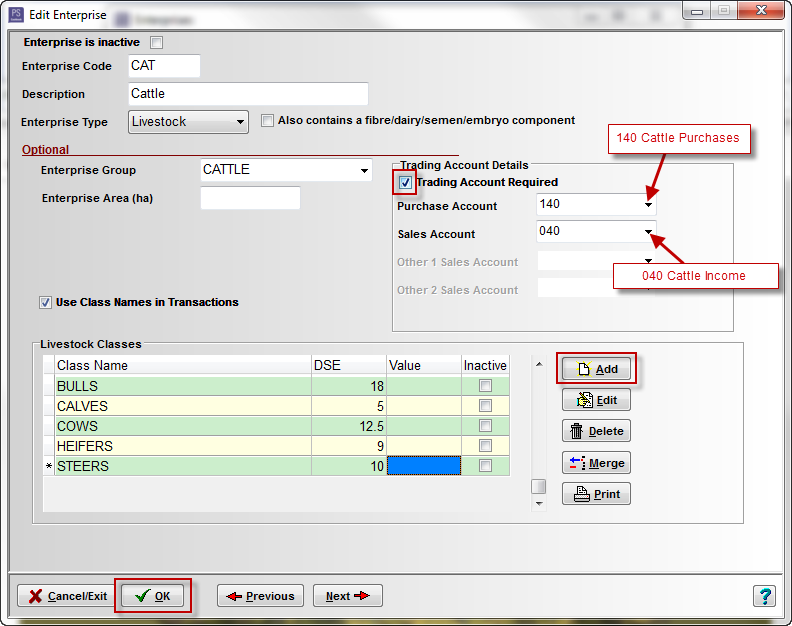
- Add all the relevant information.
- Tick the Trading Account Required checkbox to indicate that trading account details are to be maintained for this enterprise. Then set the relevant purchase and sale account for livestock sales & purchases.
- Note: purchase and sale accounts can be set as a single account or you can use a control account to automatically pick up all sub-accounts under that account.
- Tick the Also contains a fibre component checkbox to associate fibre sales with a livestock type. (eg. wool from sheep), if relevant or
- Tick the Also contains a by-product component checkbox to associate a by-product sales with a crop type. (eg. cotton seed from cotton), if relevant
- Tick the Use Class names in Transactions checkbox if you wish to record livestock trading at individual livestock class level e.g. bulls, calves, cows, heifers, steers(recommended). Add the required livestock classes with their related DSE and Value per head.
- Tick the Use Crop ID's in Transactions checkbox if you wish to record crop trading down to individual crop ID level e.g. 2001 Oat Crop, 2009 Oat Crop. Enter the required crop ID's and the related Area in hectares and Value per tonne.
- Click on the OK button to save.
For example:
Step 3: Setting up Advanced Trading Accounts
- Click on the Setup > Advanced Trading Accounts menu option.

- Click Yes to the Confirm message: 'Do you want to recalculate all of the sales and purchases now?'. The systems will build a trading account for each current enterprise that has been marked as 'Trading Account Required'.

- Note: If you change any of the options (ie. As at date, Accounting Method or Stock valuation basis), you will need to click the Recalculate button to refresh the underlying trading account information.
- Click on the [+] next to the trading account section (<Livestock> or <Crop>) to display the enterprises in that section.
- Click on the enterprise name, e.g. Cattle.
For Taxation/Accounting Reporting section:
- If Use Average Cost is selected as your stock valuation method:
- Enter Opening stock value total as at the beginning of the financial year. This should be extracted from financial statements prepared by your accountant.
- Enter Opening total dollar value and Closing total dollar value per unit for any by-product/fibre accounts if used.
- Note: this may already have been set up via the Setup Wizard when opening balances were entered, or automatically carried forward from the previous year.
- Enter Natural Increase value. (See ATO Valuing livestock - Natural Increase)
- Ration account - select from drop-down list. (e.g. 550 personal drawings). (See. ATO Valuing livestock - Stock killed for rations.)
- If Use Market Values is selected as your stock valuation method:
- This will hide opening stock/natural increase information as it would no longer be relevant.
- Ration account - select from drop-down list. (e.g. 550 personal drawings). (See. ATO Valuing livestock - Stock killed for rations.)

- Click on the Opening Stock button to enter management opening balances
- Enter opening stock numbers (Quantity), Unit Value ($ per unit).
- Note: this may already have been set up via the Setup Wizard when opening balances were entered, or automatically carried forward from the previous year.
- Note: if you are not using livestock classes, enter the opening values against the <UNCLASSIFIED> class.
- Note: this will also include any linked fibre or by-product accounts
- Click on the OK button to save.

- To see the immediate effect of entering the Opening Stock numbers and values, click on the Recalculate button.

- Click on the Close button.
- Click Yes to Confirm message 'Save changes to the trading accounts?'
- Use Reorder Livestock Classes (or Reorder Crop Id's) button to change the listing order of the livestock classes (crop id's).
- Click on the [+] on the side of the enterprise (e.g. Cattle) to display the related classes. As a class is highlighted, the trading account worksheet will display as follows.
For example:
