 Teamviewer
PS Cashbook
What to do when you get a new computer?
Summary
What do I do when I get a new computer?
Detailed Description
What to do when you get a new computer:
PS Cashbook Plus!
- Backup data from your old computer
- Install PS Cashbook Plus! onto your new computer
- Register your new PS Cashbook Plus! installation
- Restore your backup
Step 1- Backing up your data
If you do not have access to the Practical Systems’ Data Warehouse you will need to back up your data to a USB Stick.
If you have one company:
- Click on the File > Backup Data Files menu option.
- In the Backup Data Files screen, click on the Browse button.
- Find your USB in the file explorer. It will be marked as Removable Disk or USB Disk in Computer or My Computer.
- Click on the Save button.
- This will take you back to the Backup Data Files screen.

- Tick all the years listed underneath your company name, including Most Recent Year.
- Click on the Start Backup button. After processing, your files will be saved onto your USB.

- Click OK to the Information message: 'Backup Complete.'
If you have more than one company:
- Click on the File > Multi-Company Backup menu option.
- In the Backup Data Files box, click on the Browse button.
- Find your USB in the file explorer. It will be marked as Removable Disk or USB Disk in Computer or My Computer.
- Click on the Save button. This will take you back to the Backup Data Files screen.

- Make sure all the companies are ticked (this will select all years for each company).
- Click on the Start Backup button.

- Click OK to Information message: 'Backup Complete.'
- Your company files will be saved onto your USB.
Step 2- Install Cashbook Plus! onto your new computer.
- To ensure you are installing the most up to date version of PS Cashbook Plus! it is best to install the program from our website.
- Go to https://www.practicalsystems.com.au/
- Click on the drop down arrow beside CLIENT SUPPORT tab and select Client Downloads.

- Login with your Practical Systems Client ID and Password. Your client ID is 5 characters long and usually starts with a zero.

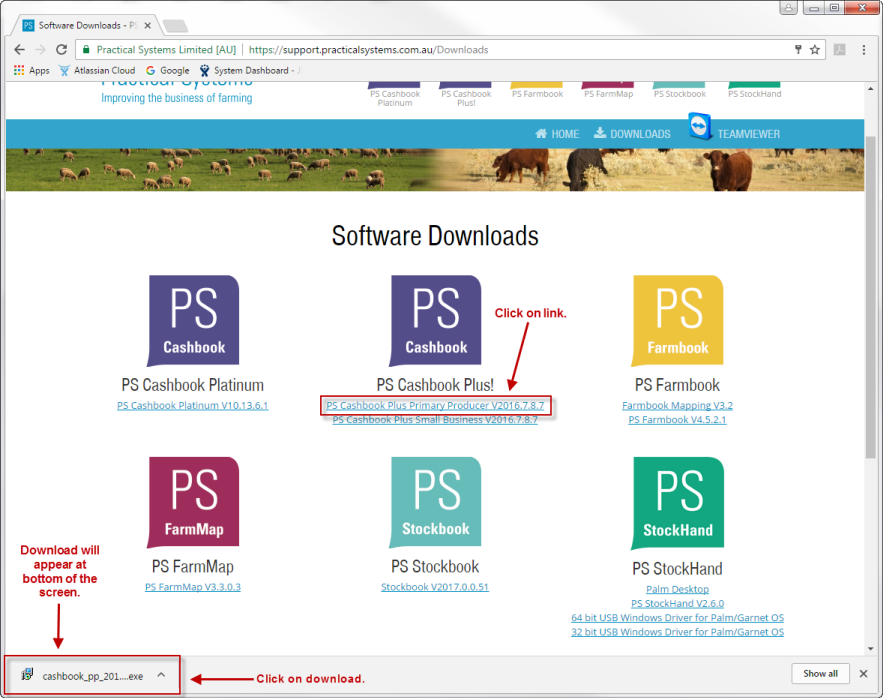
- Select the program you wish to install (Primary Produicer or Small Business) by clicking on the blue link.
- Download will appear at the bottom left hand side of the screen.
- Click on the download to install.
- Click on the Run button.
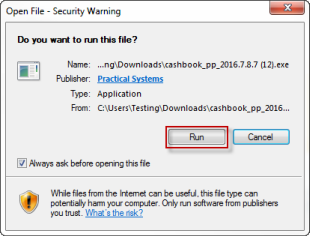
- Click Yes to message: 'Do you want to allow the following program to make changes to this computer?'
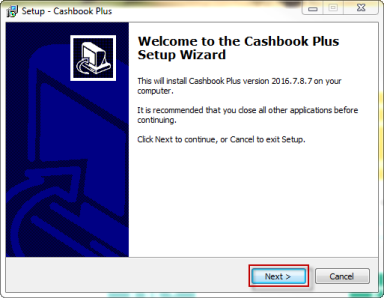
- Click on the Next button.
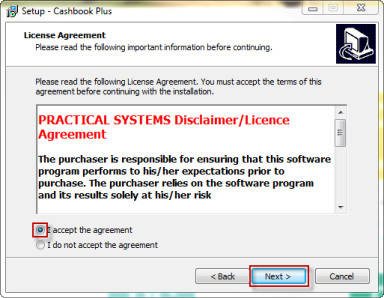
- Click on the I accept the agreement radio dial.
- Click on the Next button.
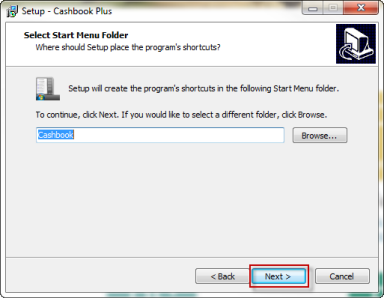
- Click on the Next button.

- Click on the Next button.
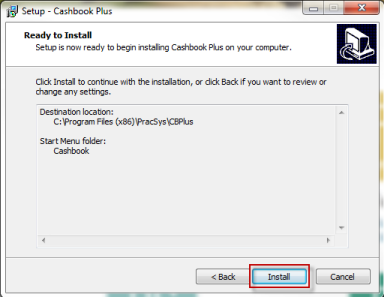
- Click on the Install button.
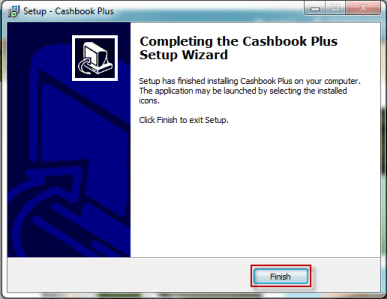
- Click on the Finish button.
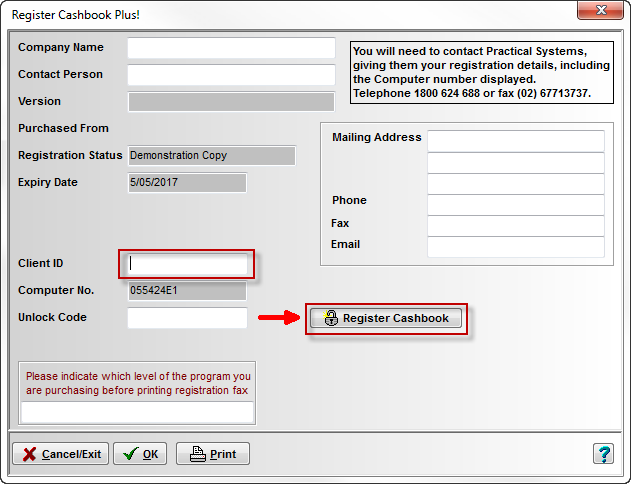
Step 3- Register your program
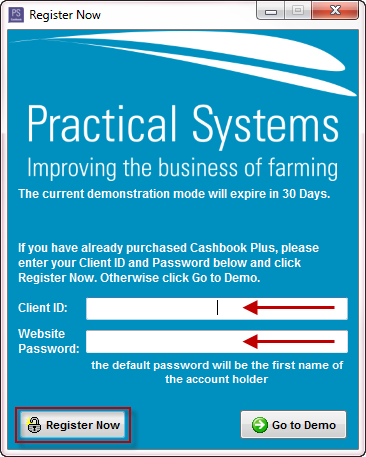
- When the Cashbook Plus! installation is complete, double click on the Cashbook Platinum icon on your Desktop.
- The Register Now window will appear:
- Enter your Client ID and Password.
- Click on the Register Now button.
If you have skipped this window by clicking on Go to Demo, you will need to register your program using the following steps:
- Click on the File > Registration menu option.
- Enter your Client Id.
- Click on Register Now button.
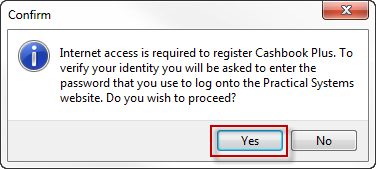
- Click Yes to the following Confirm message:
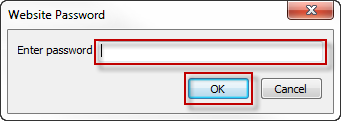
- Enter your Practical Systems password:
- Click OK button.
- Click OK to the Information message: 'Your registration has been successful.'
- Click OK to Information message: 'Cashbook has beenregistered as level 4 purchased.'
Was this helpful?
Not helpful (
) Very helpful