Teamviewer
PS Stockbook
Stockbook Setup Wizard
Summary
How do I setup Stockbook using the Setup Wizard?
Detailed Description
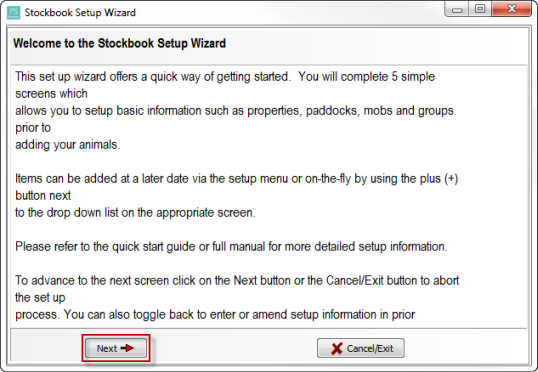
The set up wizard offers a quick way of getting started. You will complete 5 simple screens which allows you to setup basic information such as properties, paddocks, mobs and groups prior to adding your animals.
Items can be added at a later date via the setup menu or on-the-fly by using the plus (+) button next to the drop down list on the appropriate screen.
Please refer to the quick start guide or full manual for more detailed setup information.
- If not automatically prompted, click on Setup > Setup Wizard menu option.
- Read instructions.
- Click on the Next button to continue.
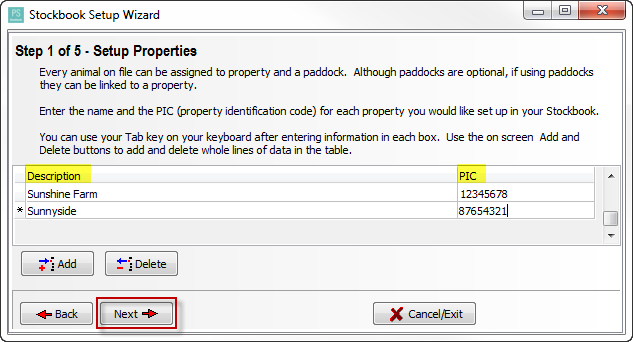
Step 1 of 5 - Setup Properties
Every animal on file can be assigned to a property and a paddock. Although paddocks are optional, if using paddocks they can be linked to a property.
You can use your Tab key on your keyboard after entering information in each text box. Use the on screen Add and Delete buttons to add and delete whole lines of data in the table.
- Click in the text box in the Description column and enter the name of your property. e.g Property 1
- Click on your Tab key on your keyboard to move to next text box.
- Enter the PIC.
Note: A Property Identification Code (PIC) is an eight-character code allocated by the Department of Primary Industries (DPI) or an equivalent authority in each state or territory to identify a livestock-producing property. The PIC forms the basis of Australia's food safety and traceability programs.
- Click on your Tab key on your keyboard to move to next text box.
- Repeat process for each property.
- Click Next button to accept data and to continue to Step 2.
For example:
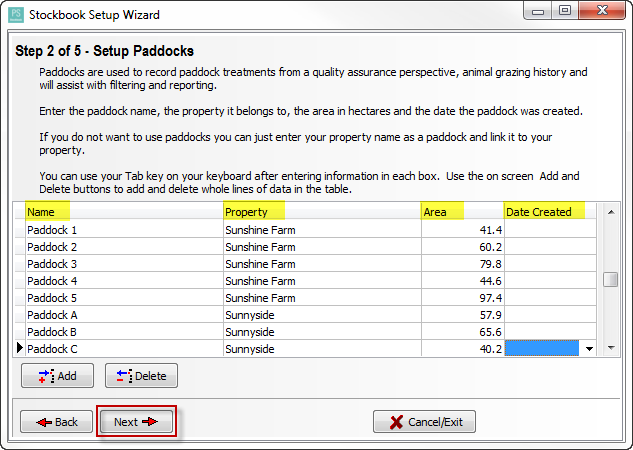
Step 2 of 5 - Setup Paddocks
Enter the paddock name, the property it belongs to, the area in hectares and the date the paddock was created.
If you do not want to use paddocks you can just enter your property name as a paddock and link it to your property.
- Name - this must be unique.
- Click on your Tab key on your keyboard to move to next text box.
- Property - every paddock must be linked to a property. Select the property from the drop-down list.
- Click on your Tab key on your keyboard to move to next text box.
- Area - in hectares.
- Click on your Tab key on your keyboard to move to next text box.
- Creation Date - this is optional unless you have Stockbook linked to Farmbook.
- Click on your Tab key on your keyboard to move to next text box.
- Repeat process for each paddock.
- Click Next button to accept data and to continue to Step 3.
- Note: use the on screen Add and Delete buttons to add and delete whole lines of data in the table.
For Example:
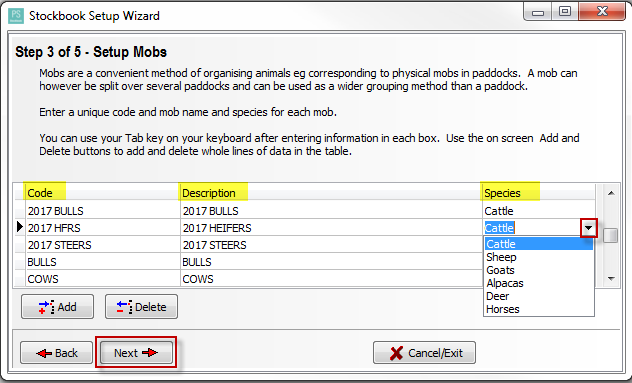
Step 3 of 5 - Setup Mobs
Mobs are a convenient method of organising animals e.g. corresponding to physical mobs in paddocks. A mob can however be split over several paddocks and can be used as a wider grouping method that a paddock.
Enter a unique code and mob name and species for each mob.
- Click in the text box in the Code column and enter a unique code. e.g 2017 HFRS
- Click on your Tab key on your keyboard to move to next text box.
- Enter the mob name in the Description column. e.g 2017 HEIFERS.
- Click on your Tab key on your keyboard to move to next text box.
- Click on the drop-down arrow to select a Species. e.g. Cattle.
- Click on your Tab key on your keyboard to move to next text box. (Repeat the above instructions to add another Mob.)
- Note: Use the on screen Add and Delete buttons to add and delete whole lines of data in the table.
- Click Next button to accept data and to continue to Step 4.
For Example:
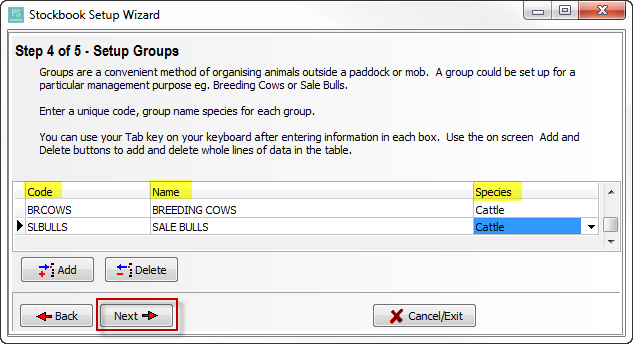
Step 4 of 5 - Setup Groups
Groups are a convenient methd of roganising animals outside a paddock or mob. A group could be set up for a particular management purpose, eg. Bredding Cows or Sale Bulls.
Enter a unique code, group name and species for each group.
- Click in the text box in the Code column and enter a unique code. e.g BRCOWS
- Click on your Tab key on your keyboard to move to next text box.
- Enter the group name in the Description column. e.g BREEDING COWS.
- Click on your Tab key on your keyboard to move to next text box.
- Click on the drop-down arrow to select a Species. e.g. Cattle.
- Click on your Tab key on your keyboard to move to next text box. (Repeat the above instructions to add another Group.)
- Note: Use the on screen Add and Delete buttons to add and delete whole lines of data in the table.
- Click Next button to accept data and to continue to Step 5.
For example:
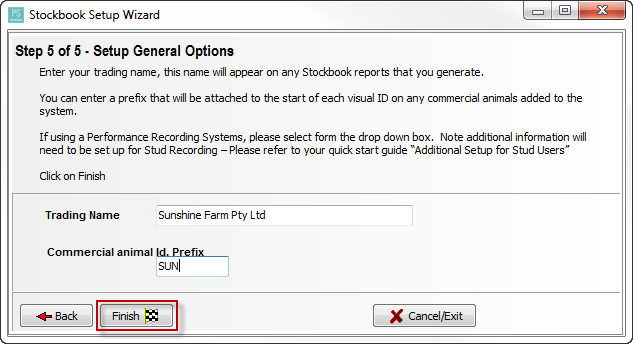
Step 5 of 5 - Setup General Options
- Click in the Trading Name text box to enter your trading name. (This name will appear on all Stockbook reports.)
- Click on your Tab key on your keyboard to move to next text box.
- You can enter a Commerical animal ID. Prefix that will be attached to the start of each visual ID on any commercial animals added to the system.
- Click on the Finish button.
For example: