 Teamviewer
PS Cashbook
Bank Feed Import - Register and Setup (Bank Feeds)
Summary
- How do I register and/or setup for automated bank statement import (PS Bank Feeds) ?
Detailed Description
Setup and Registering for Automated Bank Statement Import (PS Bank Feeds)
Practical Systems Automated Bank Statement Import is a simple and secure service that allows you to automatically import your bank transactions directly from your bank(s) into one or more of your Cashbook companies. This process will save you time and ensure complete data accuracy. It provides automatic data entry, while also allowing you to allocate or modify account coding, add or modify details, record bank transfers and even apply transactions to outstanding invoices. You can also find and match transactions you have already entered into Cashbook.
Currently, this service is only available through the following banking institutions:
-
ANZ (Australian and New Zealand Bank)
-
Bank of Melbourne
-
Bank of Queensland
-
BankSA
-
Bendigo Bank
-
Commonwealth Bank Australia
-
Macquarie Bank
-
National Australia Bank
-
Rabobank
-
Rural Bank Limited
-
St George Bank
-
Westpac Bank
1. Setup Bank Feeds
Each bank for which you require automated transaction import (what we call a Bank Feeds) requires individual set up. However, before any banks can be set up, you must register once for PS Data Feed, from within Cashbook, as detailed below.
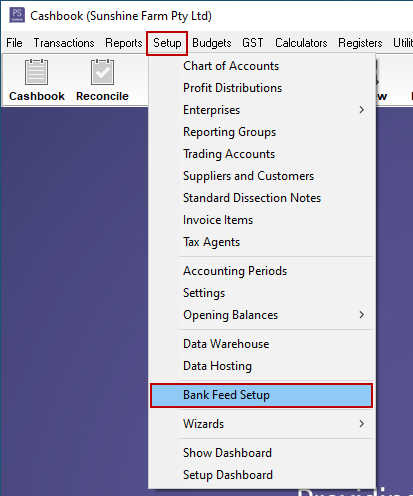
-
Click on the Setup > Bank Feed Setup menu option.
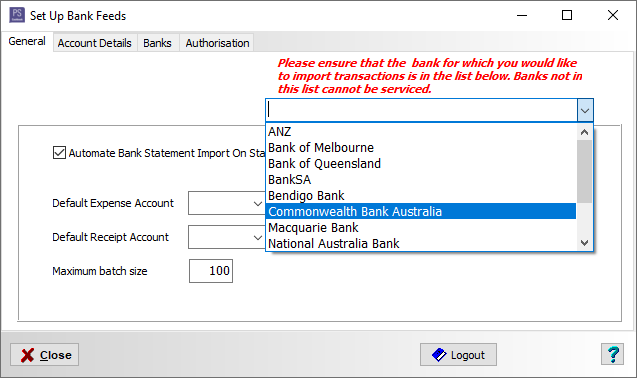
Step 1 - General tab
-
Tick the Automate Bank Statement Import On Startup if you wish to be taken to Bank Feed Import window to view and import any new transactions, each time Cashbook starts.
-
You can also use the dropdown list to check that your bank is available
-
If you would like to specifiy a Default Expense Account, choose that account from the drop-down list. The default will only be used if an account is not automatically assigned for each transaction by linking to a customer or supplier that itself has a default account. This can speed up the import process a lot, but may require some account re-allocation after the import, depending on your required level of categorisation.
-
If you would like to specifiy a Default Receipt Account, choose that account from the drop-down list. The default will only be used if an account is not automatically assigned for each transaction by linking to a customer or supplier that itself has a default account.
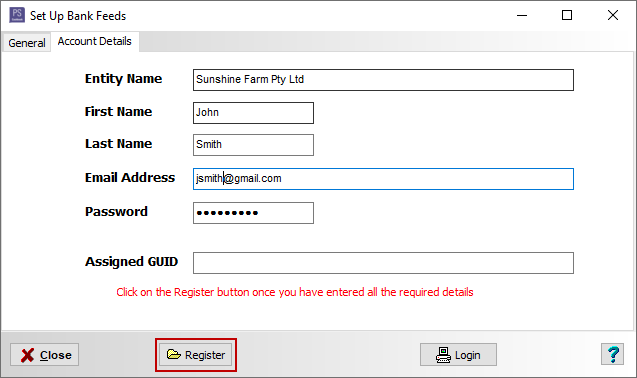
Step 2 - Account Details Tab
-
Click on Account Details
-
Fill in the required fields - see below;
-
GUID is automatically created when you click on the Register icon.
-
Click on the Register button.
For example:
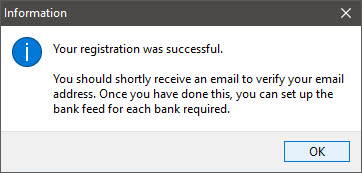
- If all details are correct, you should receive the following message. If not, please contact Practical Systems.
-
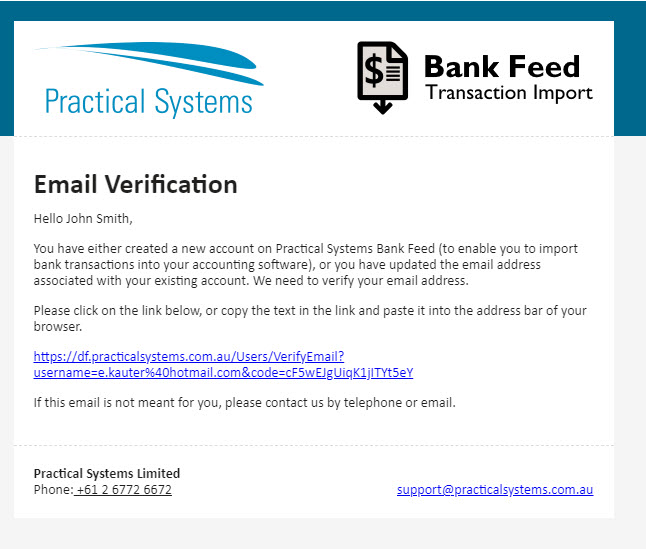
You will receive an Email Verification letter, confirming the email address you have submitted is correct. Please be sure to check Junk Email if it doesn't arrive in a few minutes
-
Click on the link provided in the email to verify your email address
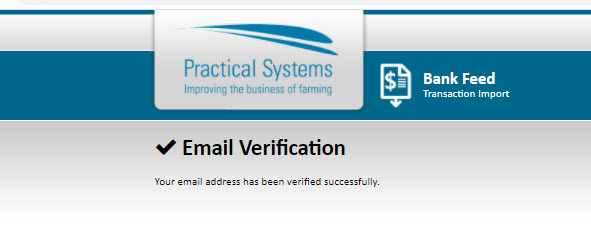
Now you can go ahead and set up your required Bank Data Feeds. See Step 3 below
Step 3 - Banks tab
You need to make sure your bank is setup in yout Chart of Accounts with BSB and Account Number details before your bank will be available in the dropdown menu of available banks
-
Click on the down arrow to Select a Bank (one of the banks listed in your Chart of Accounts).
-
Enter the BSB and Account Number of the bank selected, if not alread displayed correctly.
-
Click on the drop down arrow beside 'the selected bank is linked to window', to select the name of the bank your account is with.
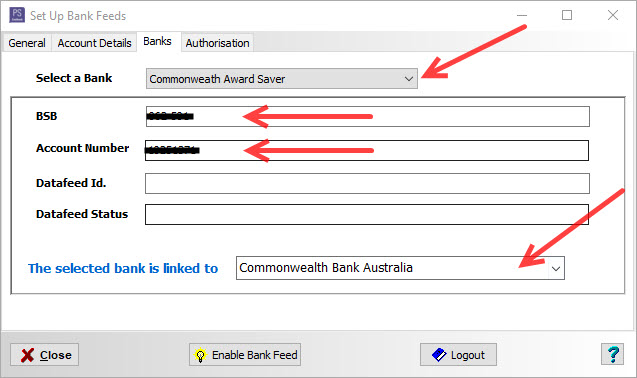
- Click on the Enable Bankfeed button.
-
You should receive the following message:
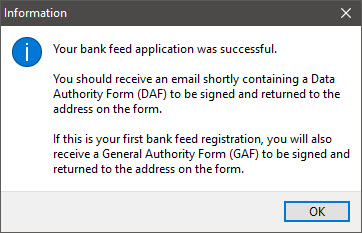
You will recieve a Bank Feed Application Form via email with the Data Authority Form attached
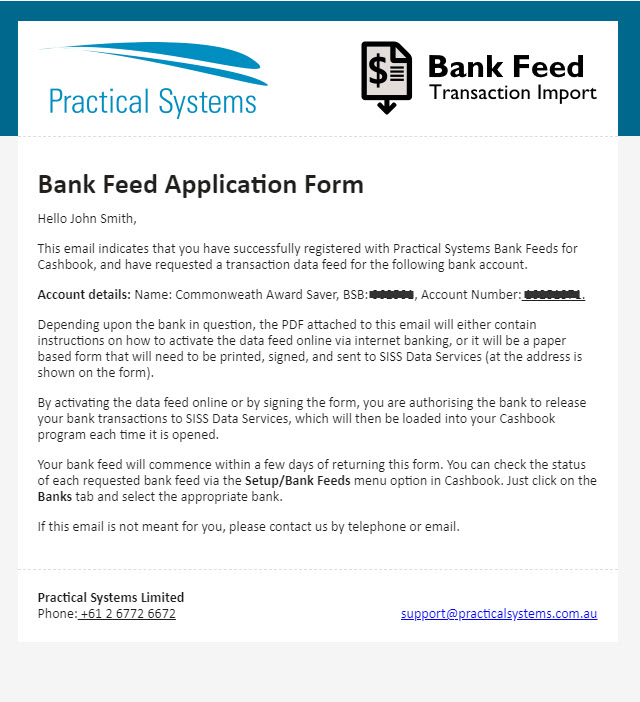
Download and print the Data Authority Form (you may have one or more of these forms depending on the number of bank accounts you have registered) authorise, scan and return the authorised form to sissdataforms@siss.com.au
DON'T EMAIL FORMS TO YOUR BANK
ANZ customers - please note that you will have the ability to register online for ANZ Bank Feeds for Cashbook. This means that, rather than receiving a Data Authority Form (DAF), you will receive an instruction sheet that explains how to activate your Bank Feeds. If you experience any difficulties with the online ANZ registration process, please call ANZ and ask for the Internet Banking Solutions Team support.
You will recieve an email from SISS Data Services when your Bank Feeds are active; this can take between 3-5 business days.
PLEASE NOTE** Bank Feeds DO NOT back date. You will need to make sure your bank accounts are reconciled up to date of activation before you will be able to process any transactions.