 Teamviewer
PS Cashbook
Import Bank Statement
Summary
How do I import my bank statement into Cashbook?
Detailed Description
Step 1: Create CSV file
- You must have already created a CSV file of your bank statement/transactions for the required period, and saved it on your computer before you begin. You can download it from your Online Banking.
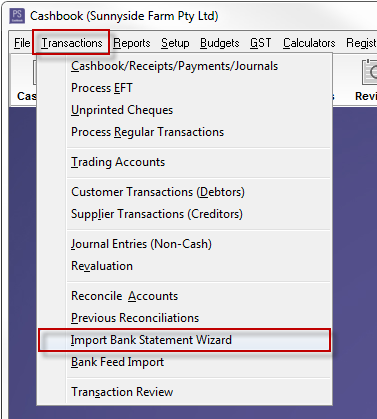
Step 2: Begin Import Bank Statement Wizard
- Click on the Transactions > Import Bank Statement Wizard button.
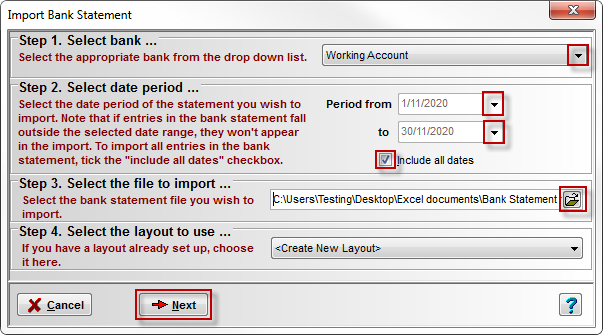
Step 3: Import CSV File into bank/credit card account.
- In the Import Bank Statement window, work your way through each of the steps:
- Step 1 - Select the bank account or credit card account to import transactions into.
- Step 2 - If you want to restrict incoming transactions to a specific date range, enter the dates, otherwise ensure Include all dates is ticked.
- Step 3 - Select the CSV file to import.
- Step 4 - Select the layout you wish to use. If you have not previously defined a layout for the selected bank, choose the <Create New Layout> option. The layout tells Cashbook what type of information is contained in each of the incoming columns in the selected file.
- Click on the Next button.
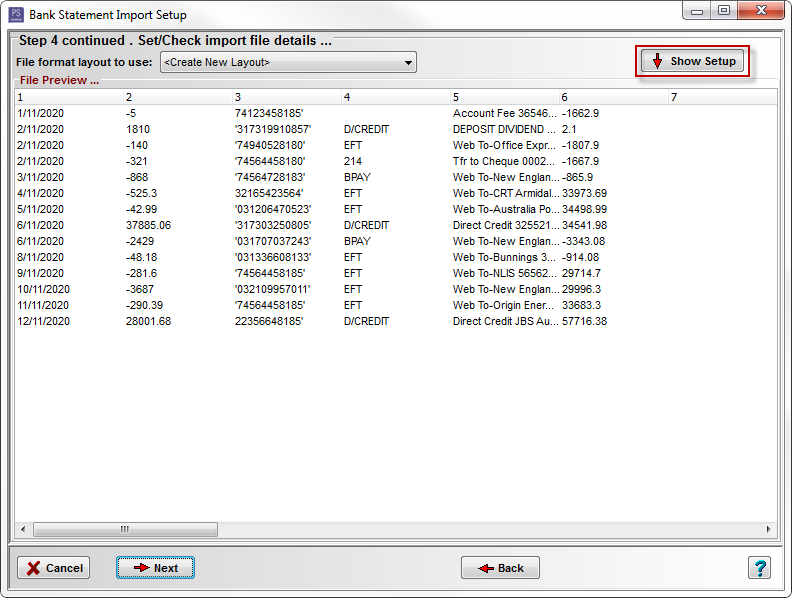
Step 4: Set/Check Import file details
- If you selected the <Create New Layout> layout option, the information in the selected file will appear. You then need to tell Cashbook what is represented in each column.
- Click on the Show Setup button.
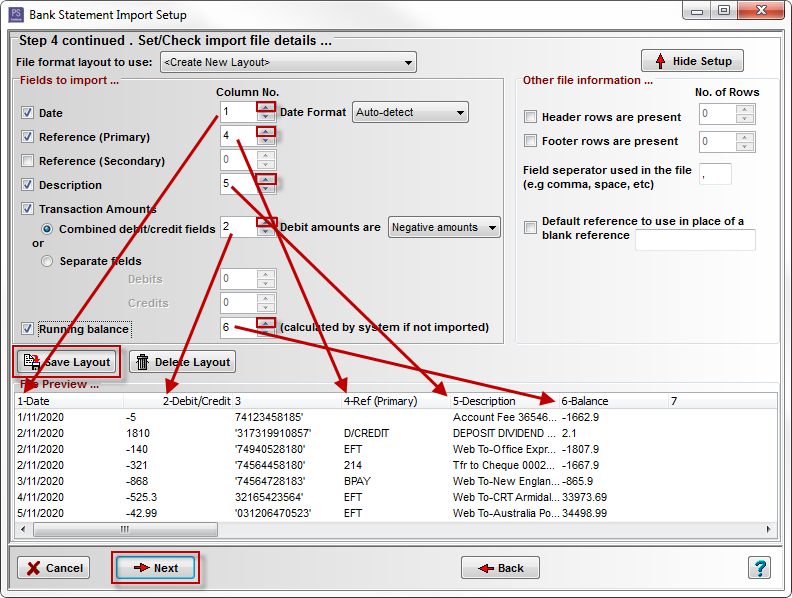
Step 5: Create Bank Statement Import Template
- You need only define the columns that you wish to import, but you will need a Date and Transaction Amounts, and preferably a description and reference.
- For Transaction Amount, you will need to indicate if there are separate columns for debits and credits, or, if only 1 amount column exists, how debit amounts are identified.
- If there are rows at the top or the bottom of the data that do not represent valid transactions, tick the Header rows are present and/or Footer rows are present and select how many rows should be ignored.
- You can specify a default reference, for any transactions that do not have a specific reference.
- Click on the Save Layout button and give the layout a name. This layout can then be selected next time you import data for the selected bank. You should then be able to ignore Step 5.
- Click on the Next button.
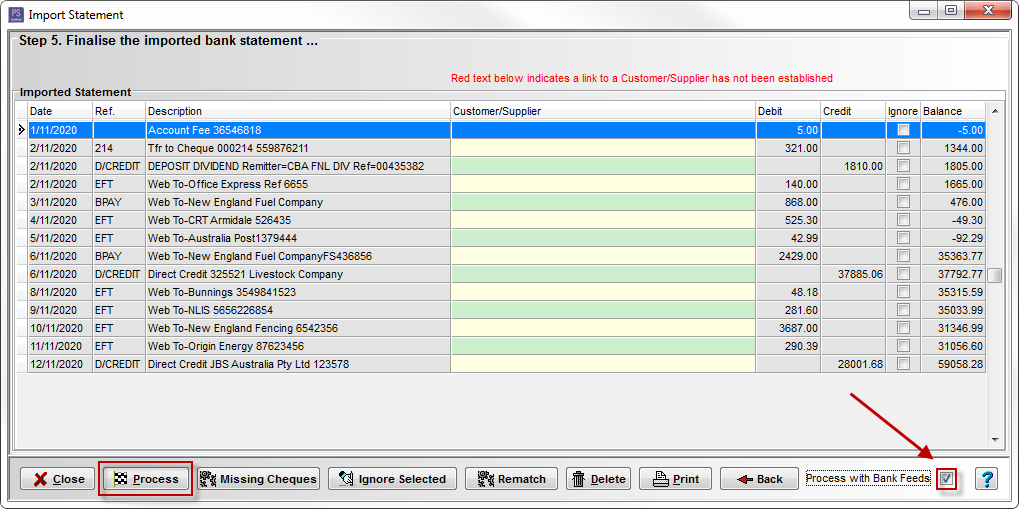
Step 6: Finalise the imported bank statement
- You will then be shown the transactions again with correct column headings. If this screen is blank, please go back to Step 3 and ensure the dates are correct (or simply tick Include all dates).
- Tick the Process with Bank Feeds box.
- Click on the Process button, to complete the processing for each transaction.
Was this helpful?
Not helpful (
) Very helpful