 Teamviewer
PS Stockbook
Connecting Devices to Stockbook
Summary
How do I connect my device to Stockbook?
Detailed Description
Before you are able to use your device in Stockbook it will need to be connected/paired with your computer. To do this you will need to follow the instructions from the device's manufacturer or contact them if you are unsure. This could be via Bluetooth, USB-Serial adaptor or Serial port. Once the device is connected/paired to the computer you can connect it to Stockbook to use in Live Entry. For a device to be connected properly, it will be assigned a COM port by your computer. If it is not assigned a COM port, then Stockbook can't communicate with it, and you will need to contact your hardware manufacturer.
Hint:
If you are using a USB - Serial adaptor to attach your hardware with a cable, you will need to ensure that the correct driver for that adaptor is loaded on your computer. It is quite common for users to buy a new computer and expect their old USB - Serial adapter to work in their new computer. It will only work if you have loaded the driver, either from the CD that came with it, or you should be able to download the driver from the manufacturers website.
Step 1.
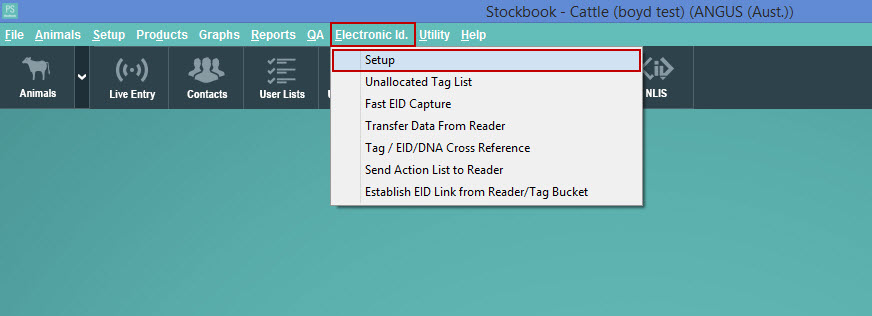
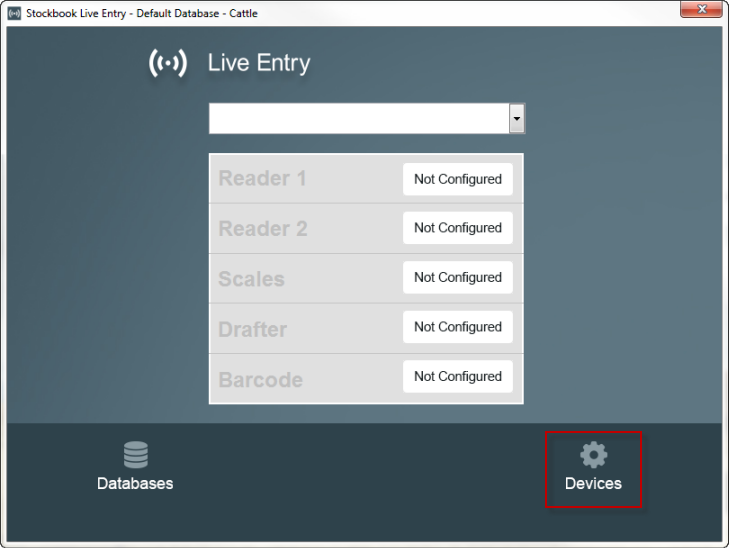
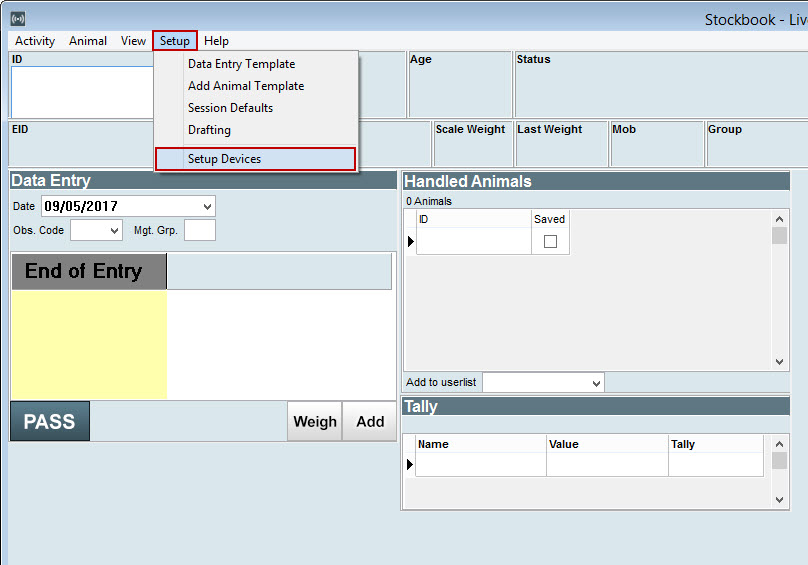
Connected devices can be setup from three different parts of Stockbook:
► OPTION 1:
- Go to Electronic Id. > Setup
► OPTION 2:
- Click on the Live Entry toolbar icon.
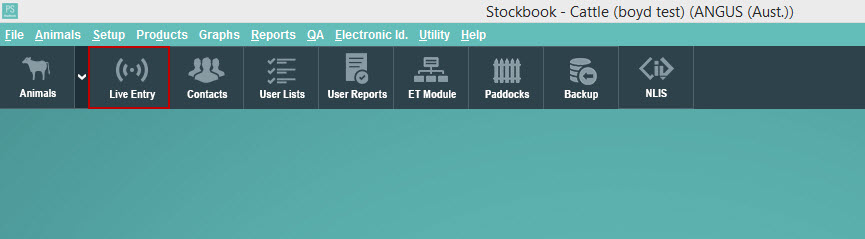
- Click on the Devices icon.
► OPTION 3:
- From within Stockbook Live Entry, click on Setup > Connected Devices menu option.
Step 2.
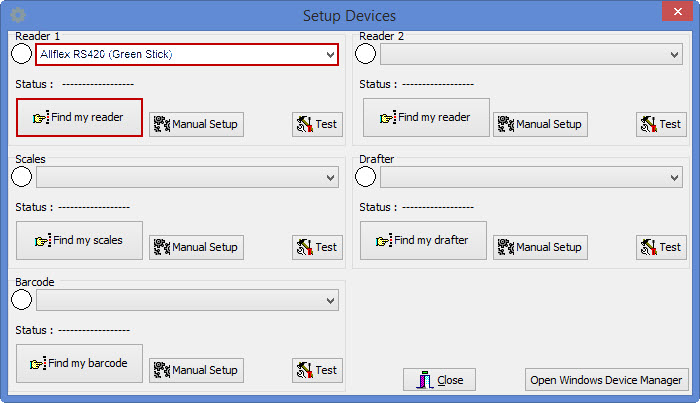
- In the Device Discovery screen, you can start to configure your devices:
- Click on the drop-down arrow to select the device (Brand/Model) you wish to connect.
- Click on Find my reader/scales/barcode/drafter, this will search for the device.
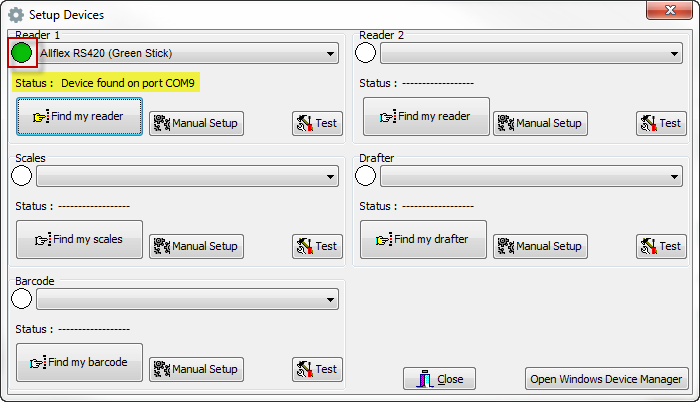
- Click OK to the Warning message:' Before proceeding, please ensure that the device is plugged in (or connected via Bluetooth) and turned on.'
- Click OK to the Information message: 'The device was found on COMP9'. (Note: This message will only appear if your device is discoverable.)
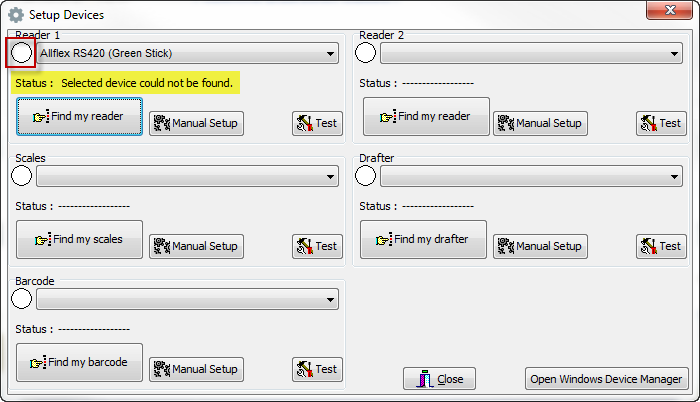
- OR
- Click OK to the Warning message: 'The selected device coulc NOT be located.' (Note: This message will only appear if your device is non-discoverable.)
Step 3.
- Stockbook will find your device if it is discoverable. If your device is non-discoverable, you will need to manually setup that device.
- If it is discoverable, a green light will appear beside the device name. Status: Device found on applicable port, e.g. COM9.
- If it is non-discoverable, a white light will remain beside the device name. Status: Device could not be found.
For example:
For example:
Step 4.
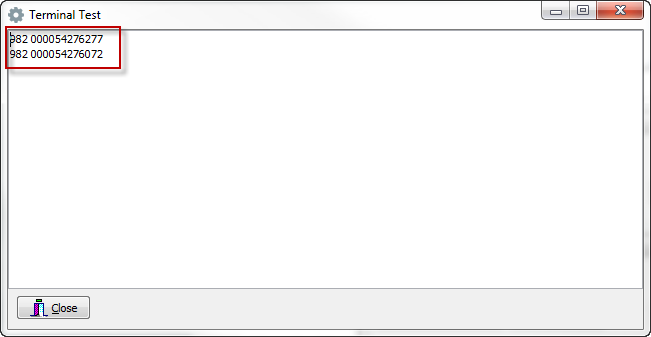
- Once your device has been discovered and is connected, you can test that it is working properly by click on the Test button.
- For example: An EID Tag Reader:
- Click on the Test button.
- Read an EID Tag.
- The EID number of that tag will appear in the Terminal Test box.
- If nothing appears in the Terminal Test box, the device (reader in this case) is not connected properly. Refer to Manual Setup for Devices or contact Practical Systems for more help.
Step 5.
Now that your device is connected you will be able to visually see from the front screen.
Green indicates that your device is sucssesfully connected.
Red indicates that your device is NOT sucessfully connected, and you need to reconnect your device.

Step 5.
When your devices are all connected, you can proceed to Live Entry by selecting the "Start Live Entry" button.