 Teamviewer
PS Stockbook
Importing tag bucket files to add to existing animals
Summary
How do I import the NLIS ID for cattle that are already on Stockbook?
Detailed Description
When you purchase your NLIS tags, you can request your supplier to provide you with a file (either on disk or email), containing NLIS Id's and related EID's, or you can obtain a list directly from the NLIS database. This list can be imported directly into Stockbook. To do this:
Step 1
- For information on downloading your tag bucket file Click Here.
Step 2
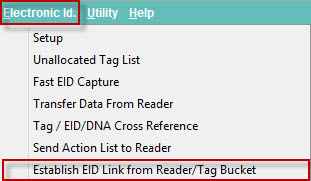
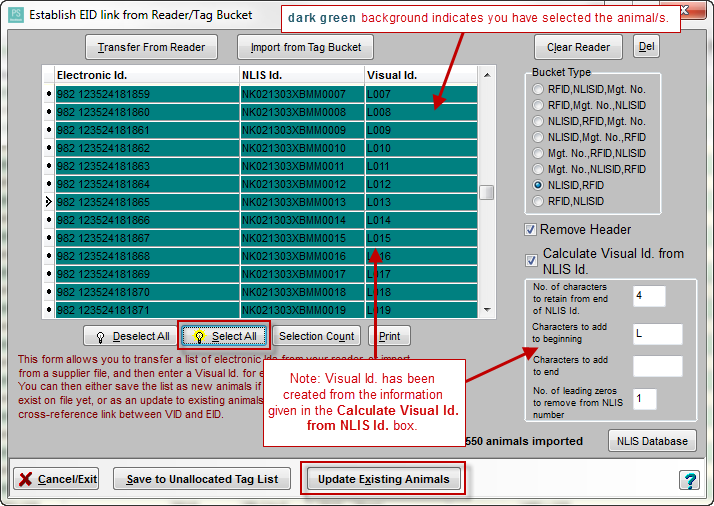
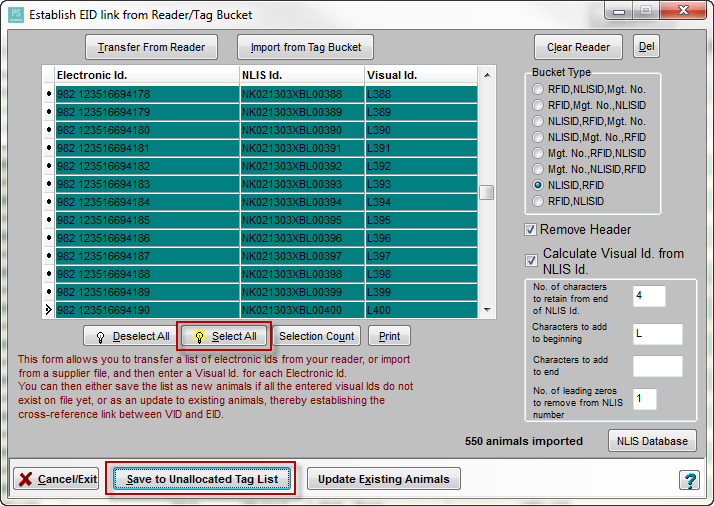
- Click on the Electronic Id. > Establish EID Link from Reader/Tag Bucket menu option.
Step 3
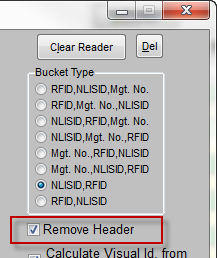
- Choose the Bucket Type that you are importing. This is the order in which the fields are entered into the file that you are importing from.

Step 4
- If your tag bucket file includes a row of headings, tick the Remove Header box.
- If your tag bucket file does not have headings, leave the Remove Header box unchecked.
Step 5
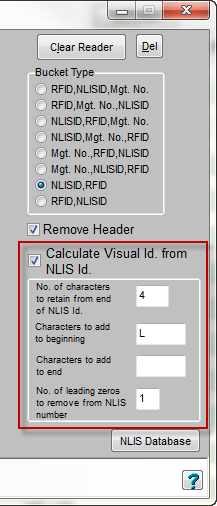
- Indicate the number of digits from the NLIS number to retain from the right hand end of the number, to use as your management tag (Primary Id. in Stockbook) As each record is read from the file, Stockbook will retain a specified number of digits from the NLIS Id, and assign these as a VID management tab.
- For Example:
- NLIS Number - ABCD2345XBL00001
- A default farm tag number of L0001 (L - representing the year (2015), and 0001 - representing the first calf born in that year.)
- Select the number of digits (characters) you want to retain. eg. 4 (ie. you can record up to 9999 animals)
- Select the character/s you would like to add to each calculated VID. eg. Add the character L to the beginning. (L represents calves born in 2015)
- Select the number of leading zeros you wish to remove from the NLIS number for management purposes. eg. 1 (ie. The visual ear tag will now be L001.)
Step 6
- Click the Import from Tag Bucket button.
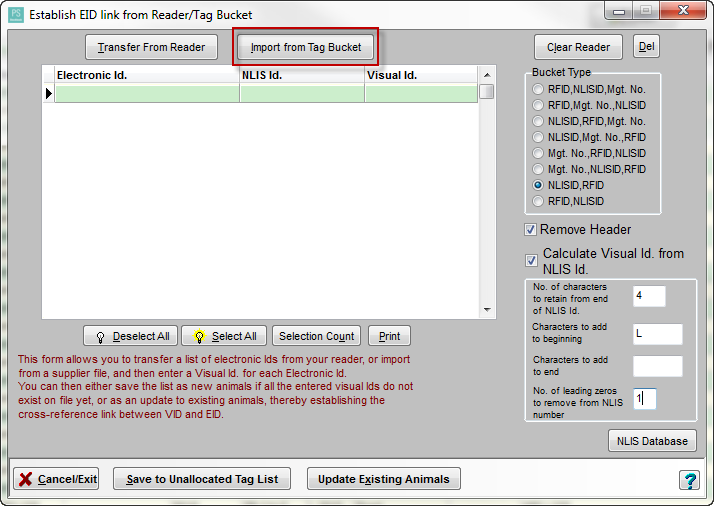
- Search your computer files for your saved NLIS tag bucket file.
- Click Open.
- Click Yes to Confirm message: 'Import RFID's from C:\.....\....\ReportResult.txt now? Please note that any EID's already on file will not be listed.'
Step 7
- You will need to select some or all of the animals on the list to save.
- Click on Select All to select all records.
- The selection process is identical to that used on the current animal listing.
- To select animals in a contiguous group, click on the first animal in the group, hold down the Shift key and then click on the last animal in the group.
- To select individual animals, hold down the Ctrl key and click on each individual animal.
- A dark green background means that you have selected the animal/s.
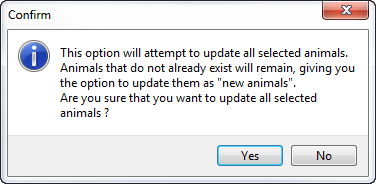
- Click the Update Existing Animals button.
- Click Yes to the following Confirm message:
- You may get the following error message if you have unused tags:
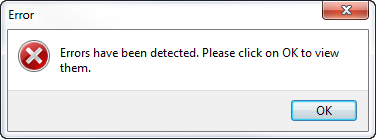
- Click OK to view the list. For example:
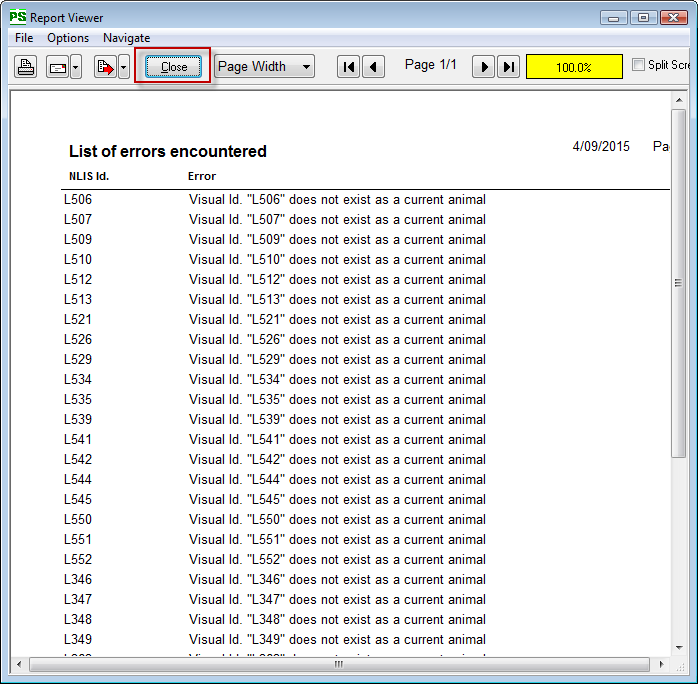
- Click Close button.
Step 8
- Click on the Select All button.
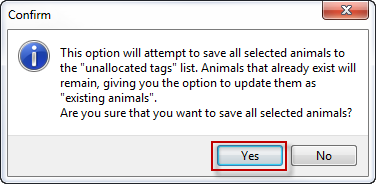
- Click on the Save to Unallocated Tag List button.
- Click Yes to the following Confirm message:
- This will clear the animal list in the Establish EID link from Reader/Tag Bucket window.
- Click Cancel/Exit button to close.
Step 9
- Return to the current Animals screen to view changes.
Was this helpful?
Not helpful (
) Very helpful